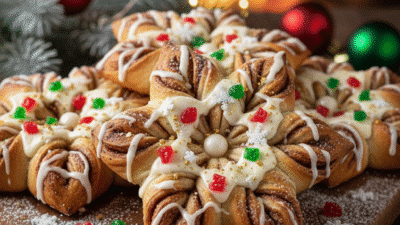
Oh, the magic of Christmas cookies! There’s simply nothing like the aroma of freshly baked gingerbread or sugar cookies wafting through your home during the holiday season. These classic cut-out Christmas cookies are more than just a sweet treat; they’re a blank canvas for creativity, a joyful activity for the whole family, and a delicious way to spread holiday cheer. Imagine little hands eagerly pressing cookie cutters, the excitement of decorating with colorful icing and sprinkles, and the pure bliss of biting into a tender, buttery cookie. This recipe is tried, true, and guaranteed to become a beloved part of your family’s holiday traditions. Get ready to bake some edible joy!


Ingredients
-
1 cup (226g) unsalted butter (softened)
-
1 1/2 cups (300g) granulated sugar
-
1 large egg
-
2 teaspoons pure vanilla extract
-
3 1/2 cups (420g) all-purpose flour
-
1 teaspoon baking powder
-
1/2 teaspoon salt
-
4 cups (450g) powdered sugar (for royal icing)
-
3 tablespoons meringue powder (for royal icing)
-
1/2 cup (120ml) warm water (for royal icing (more as needed))
-
Assorted gel food coloring (optional, for icing)
-
Various Christmas sprinkles (optional, for decorating)
Instructions
In a large bowl, using an electric mixer, cream together the softened unsalted butter and granulated sugar until light and fluffy. This usually takes about 2-3 minutes.
💡 Tip: Make sure your butter is truly softened, not melted, for the best creamy texture!
Beat in the large egg and pure vanilla extract until well combined, scraping down the sides of the bowl as needed.
In a separate medium bowl, whisk together the all-purpose flour, baking powder, and salt. This helps to distribute the leavening agents evenly.
Gradually add the dry ingredient mixture to the wet ingredients, mixing on low speed until just combined. Be careful not to overmix, as this can make your cookies tough. The dough will be thick.
Divide the dough into two equal portions. Flatten each portion into a disk, wrap tightly in plastic wrap, and refrigerate for at least 1-2 hours, or until firm. Chilling is crucial for easy rolling and preventing spread.
Preheat your oven to 375°F (190°C). Line baking sheets with parchment paper or silicone baking mats.
On a lightly floured surface, roll out one disk of chilled dough to about 1/4-inch thickness. Use your favorite Christmas cookie cutters to cut out shapes. Carefully transfer the cut-out cookies to the prepared baking sheets, leaving about 1 inch between them. Gather dough scraps, gently re-roll, and cut more cookies.
Bake for 8-10 minutes, or until the edges are lightly golden. Baking time will vary depending on the size and thickness of your cookies. Keep a close eye on them to prevent over-browning.
Let the cookies cool on the baking sheets for 5 minutes before transferring them to a wire rack to cool completely. They must be completely cool before decorating.
While cookies cool, prepare the royal icing: In a large bowl, combine the powdered sugar and meringue powder. Gradually add the warm water, mixing on low speed with an electric mixer until a thick, smooth icing forms. Increase speed to medium-high and beat for 5-7 minutes until stiff peaks form. If the icing is too thick, add more water, a teaspoon at a time; if too thin, add more powdered sugar.
Divide the royal icing into separate bowls and tint with gel food coloring as desired. Transfer icing to piping bags fitted with small round tips or Ziploc bags with a tiny corner snipped off. Decorate your cooled cookies as creatively as you like with the icing and sprinkles! Allow decorated cookies to dry completely (this can take several hours, or even overnight) before stacking or storing.
💡 Tips
- Don't overmix your dough! Overworking the flour can develop too much gluten, leading to tough cookies.
- Chilling the dough is non-negotiable for cut-out cookies. It prevents spreading and makes the dough much easier to handle.
- For perfectly even cookies, use a rolling pin with thickness guides or measure with a ruler.
- Bake one sheet at a time for more consistent results, rotating the pan halfway through if your oven has hot spots.
- Always let cookies cool completely before decorating to prevent melting your icing.
🎨 Variations
- Spiced Christmas Cookies: Add 1 teaspoon of ground cinnamon, 1/2 teaspoon of ground nutmeg, and 1/4 teaspoon of ground cloves to the dry ingredients for a warm, spicy flavor.
- Citrus Zest: Add 1-2 tablespoons of finely grated orange or lemon zest to the butter mixture for a bright, fresh twist.
- Almond Extract: Substitute half of the vanilla extract with almond extract for a delightful nutty flavor.
- Chocolate Dipped: After baking and cooling, dip half of the cookies in melted chocolate (milk, dark, or white) and sprinkle with festive nonpareils before the chocolate sets.
- Glaze Icing: For a simpler decoration, make a basic glaze by whisking powdered sugar with a little milk or lemon juice until smooth and drizzly. This dries faster than royal icing.
📊 Nutrition
Recipe FAQs
Can I make the cookie dough ahead of time?
Absolutely! You can prepare the dough up to 3 days in advance and keep it tightly wrapped in the refrigerator. You can also freeze the dough for up to 3 months. Just thaw in the refrigerator overnight before rolling and baking.
How do I store decorated Christmas cookies?
Once the royal icing is completely dry (which can take several hours), store the cookies in an airtight container at room temperature for up to a week. You can also freeze undecorated baked cookies for up to 3 months; thaw them at room temperature before decorating.
Why are my cookies spreading too much?
There could be a few reasons: your butter might have been too warm or melted, you didn't chill the dough long enough, or your oven temperature might be off. Ensure your butter is just softened, chill the dough thoroughly, and consider investing in an oven thermometer to verify accuracy.
Can I use different types of icing?
Yes! While royal icing provides a beautiful, hard-setting finish perfect for intricate designs, you can also use a simple buttercream frosting, a powdered sugar glaze (powdered sugar + milk/water), or even store-bought tube icing for quick decorating fun.
And there you have it – the perfect recipe to create some truly magical Christmas memories in your kitchen! These Sparkling Classic Cut-Out Christmas Cookies are not just delicious, they're a centerpiece for holiday traditions and a wonderful way to connect with loved ones. Don't be afraid to get creative with your decorations; there's no right or wrong way to spread holiday cheer! Bake a batch, share them with friends and family, and let the festive spirit fill your home. Happy baking!


